How to pitch an Inflatable Driveway Awning
New to caravanning and looking for advice? Inflate your driveaway awning like a pro!
Mike shares his tips and tricks on how to inflate your driveaway awning ahead of your holiday. Read on to discover our full step-by-step guide below, ready for that extra bit of advice when at the campsite.
In this video, we are modelling the Vango Kela Driveaway Awning and a Motorhome with a rail height of 250cm. We recommend a few extra products to make adding to your vehicle smooth; these have been listed below.
- Driveaway Awning Kit
- Metal V-shaped pegs
- Mallet
- Pump
Step One
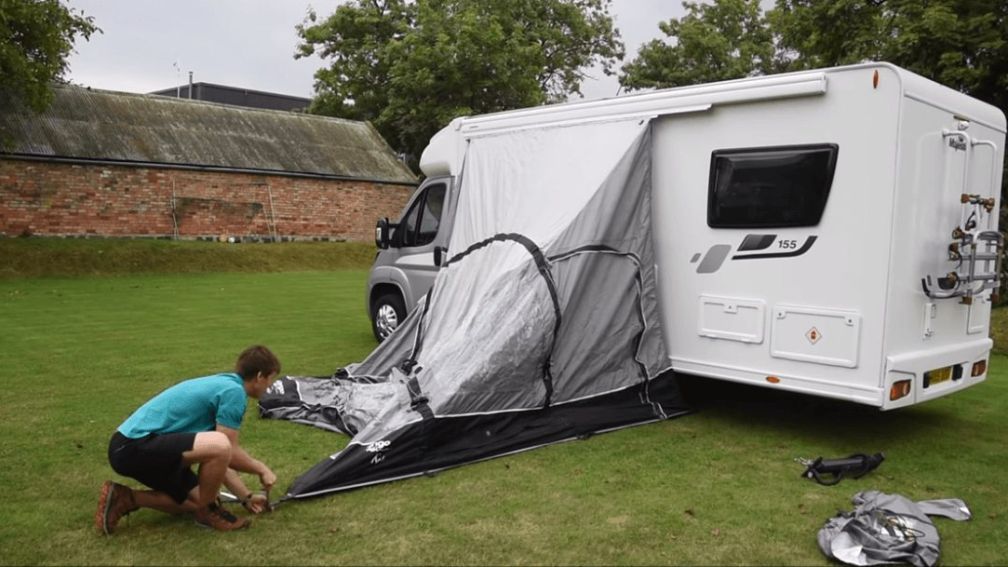
Remove the awning from the bag and unfold all components out on the ground. Place the back of the awning facing towards your vehicle and locate the kador beading.
Step Two
Wind your awning out to help make the height more manageable. Feed the first part of your fixing kit onto the fabric and continue until all three parts are attached to the driveaway awning.
Step Three
Next, you will feed the fixing kit into the wind-out awning. This step can be quite fiddly, and you may require an extra pair of hands as you may need to support the awning while feeding the kit through.
Step Four
Once you have fed the awning onto the vehicle, position it where you require and wind back the awning into the cassette until it locks into place.
Step Six
Now you will need to peg your awning nice and close to your vehicle. Mike recommends using strong, metal V-shaped pegs to be pegged underneath the vehicle. Using a mallet, hammer your pegs in the ground at a 45-degree angle while making sure the pegging point is under the vehicle by 15/30cm and repeat on both sides.
Step Seven
The next step is to physically inflate your awning. You can do this before or after pegging. In this video, Mike pegs the corner points first to ensure the awning is in line. Again, using strong, metal V-shaped pegs, hammer in your main corner points, making sure they align with the rest of your driveway awning and have tension.
Step Eight
Make sure your door is open; this will create less resistance when you come to inflate your driveaway awning. With your pump, attach it to the beam closest to your vehicle and start pumping until that section is inflated. Repeat this process on all beam inflation points, then zip up your door when completed.
Step Nine
On each side of your driveway awning, pull the adjustment straps so your awning fits more snugly to your vehicle. This will also prevent drafts from entering your tunnel section. Please note there may be excess fabric depending on the size of your awning and vehicle.
Step Ten
Now you will need to peg out the front storm straps and guylines to create tension in your roof. Mike recommends pegging these wide to increase stability in windy conditions. Adjust the tension with the top buckles.
Step Eleven
Next, you can tension the original pegging points to make sure the awning is sitting tight. Also, open any ventilation areas and try to keep a nice rectangular shape without over-pulling on any of the pegging points.
Step Twelve
With some models, you will have an additional beam to brace the roof and offer more structure. Using your pump, inflate this beam and Velcro it inside the awning roof.
A final note from us
So that completes our step-by-step guide on how to pitch an inflatable driveaway awning. We hope you have found our video and guide helpful. For all the latest tips and tricks, make sure you're following our social channels linked below.
![]()
![]()
![]()
![]()
SHOP INFLATABLE DRIVEAWAY AWNINGS
We’re always on hand to offer help and advice, give our superstore a call on 01452 742233 or send us an email on camping@attwoolls.magento24.sozowebdesign.com and we will do our best to help you.